Last spring we had a #langchat on some topics that kept coming up on the suggestion form and either never garnered quite enough votes to be a chat topic or were judged by the moderators to not have enough substance for an hour-long chat. So we polled for a “quick-snapper” chat. We offered eight of these options and decided to chat on the top four for 15 minutes each. One of the chosen topics was “interactive notebooks.”
Several of my #langchat amigos and I hang our heads in shame that of course we thought this topic referred to some sort of web 2.0 tool for interactive note-taking. Not so. In fact, quite the opposite. It turned out that interactive notebooks are actual paper notebooks. Real paper! And students “interact” with them by creating tabs they flip, gluing in elements, and so on. I still don’t have my mind totally wrapped around it, but as I do one on pioneers with my budding first-grader at home I’m getting the concept. It’s all about making it stick; interacting with information in different ways strengthens the memory pathways in the brain.
As the #langchat participants who knew what they were doing started talking about this idea of interactive notebooks, I found myself highly interested. A composition notebook has been my story-drawing curation tool of choice for my students for many years, but this interactive aspect looked like a way to really get that organized. It sounded like something that could benefit my new students this year in my very unusual situation: two groups, both novices, group size 7 or 8 students, meeting with me once a week, one group ages 6-10 and the other group ages 11-15. I liked the appeal to younger students, the organization opportunity, the space to review at home. When we did a #langcamp hangout on the topic with more teachers who seemed to be finding success with this idea, I was even more convinced.

So, here I go. An attempt at interactive notebooks. You should look at interactive notebooks on Pinterest to get a better idea of what they are if you’re not familiar with them, but frankly, most of what I found on Pinterest specifically for Spanish didn’t impress me. It struck me as taking a composition notebook and turning it into a textbook and that didn’t pinterest, (ahem), interest me. But I often find something I want to try even in ideas that don’t thrill me. Here’s my start on the interactive notebook.
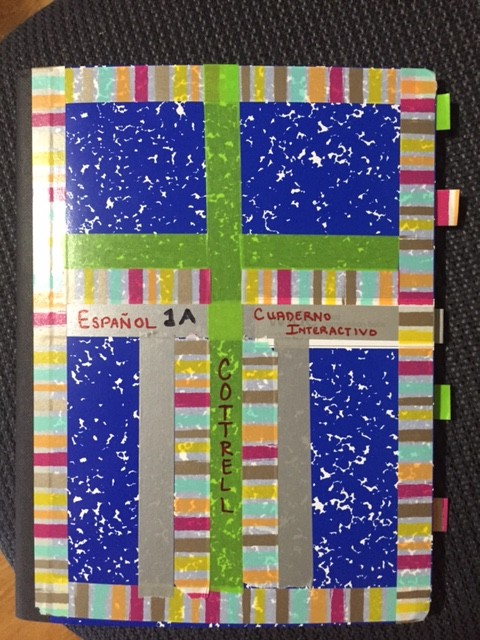
On the cover, I took Scotch Washi tape I got at Office Depot and went a little crazy with it. Just did whatever I wanted and then labeled it with my name and what the subject was.
On the first page, I have my table of contents. I’m pretty sure this is the world’s most user-friendly table of contents. I liked suggestions others had made about tables of contents, but my thought was, what page will we be on? Who wants to number all their pages? So I used Washi tape. I put five strips of tape and wrote on them with permanent marker:
- Can Do’s
Students will paste in the ACTFL Can Do statements as they are able to accomplish them. - Cuentos
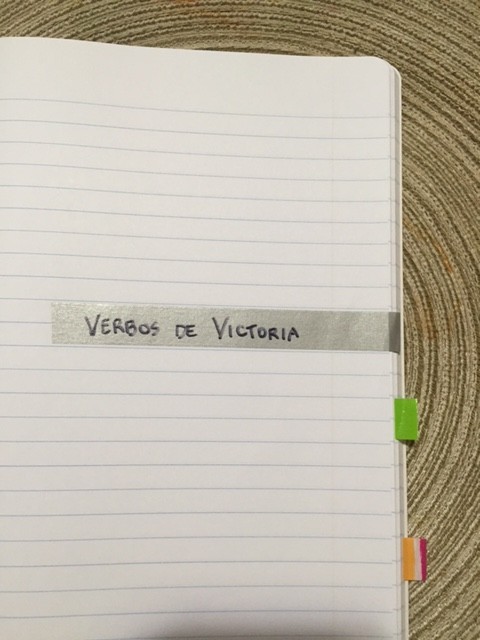
This is the space for drawing stories. - Verbos de victoria
I like the idea of having a space for notes on the essential, highest-frequency verbs. This won’t be a set of conjugation charts. I’m not sure what it will look like, but I do know it will look like how people communicate with the most-used verbs in Spanish. - A conversar
Students will note/insert tools here for developing and practicing dialogues needed to check off those Can-D0’s. - Vocabulario
I haven’t decided if we’ll glue in flaps or simply fold the page across and cut strips to create flaps (pictures later depending on what we decide) but this will be a place students can draw images to represent vocabulary, with the Spanish word underneath. They can lift the flap if they need to check the word, and as they develop more vocabulary, they won’t need to lift the flap any more.
Then, at various places in the book, I put a strip of tape the same color and approximately the same position on the page as on the table of contents and wrote the same label on it. I folded over the end but left a small amount to create a tab. So now, students can look at the table of contents and immediately get to the section they want to see.
Here’s how I divided them up:
- I knew I didn’t need a ton of space for the Can Do’s so I counted about 7 pages for them and then put in my Cuentos tab.
- I knew I wanted about a page apiece for my power verbs but I wanted to divide about 14 verbs across the two semesters, so I opened the remaining section of the notebook (after the Can Do pages) to about halfway, and then counted 4 pages on either side, giving me a divider page and 7 pages for verbs. That gave me a nice long Cuentos section.
- I divided the rest of the content about equally between A conversar and Vocabulario.
There it is so far! Not a lot, I know.
Have you tried interactive notebooks? What has worked for you?
5 Comments
Comments are closed.


Hey! Thanks for sharing. I love the sections of your interactive notebooks. I used similar sections with my students’ binders the last two years. One thing that I do different – I give the Can Do Statements at the beginning and the end of each unit of study. I don’t use a “yes, I can” and “no, I can’t system.” I prefer to use a growth mindset-inspired model: “Yes, I can do it independently,” “I can do it with help,” and “I can’t do it yet, but this is a goal.” That way, the students can use the statements as both as a both to show proficiency, but also to be inspired to work toward achieving goals.
That is a super interesting idea, Nathan. What do you think about somehow arranging it in columns so the student can move something from “I can’t do it yet” to “I can do it with help” to “I can do it independently”? I am going to think on this one! Thanks!
I am 75 and often find myself “computer-ly challenged” so I love working with real paper, both to draw on, fold and cut, or glue other pictures into – I still have the notebook I made while I was in the Don Quijote 400th aniversary reading group set up by CalStateSanMarcos. This group was led by a professor from Madrid and had about half native speakers but was mostly conducted in English. For myself the commentary about the work as literature was more enriching than the development of the Spanish language skills but I was pleased to be able to read the whole thing through. This was arduous enough that being able to supplement the effort with lots of stuff about Cervantes, his Spain, Iberian geography, and assorted other items, kept my participation high and made this one of the best adult education experiences I’ve had.
I’m so glad to see that you’re starting with Interactive Notebooks! I’ve been using them for a couple of years now. I love it, and the students all tell me that they enjoy having it, as well. I’ve posted a couple times on my blog about them (http://lasenoritalibertad.blogspot.com/2013/09/cuaderno-interactivo-estudiantil.html), but as I’m changing towards a more standards based curriculum, I’m finding that I need to update my notebooks. I loved your idea of the “Can Do’s” pages, and I know I’ve wanted to do some of those. I would say try to have all the supplies your students will need organized. That’s what always gets me. Anyways, good luck! Please keep us posted on your progress with the notebooks!
Thanks SO much for the tips and the link!